

21 Aug How to Read a Brake Metal Shop Drawing: A Practical Guide for Subs
For a busy glazing or waterproofing subcontractor, a brake metal shop drawing can feel like an unnecessary piece of paper to sign off on and move past. But the shop drawing review is actually one of the most valuable checkpoints in the entire fabrication process. It’s the last moment before metal gets cut and bent, when an error can be caught at zero cost rather than being discovered on the job site at full cost.
The good news is that brake metal shop drawings aren’t complicated once you understand what you’re looking at. Here’s a practical guide to reading them, knowing what to verify, and understanding what to push back on before you put your stamp on it.
What a Brake Metal Shop Drawing Is Telling You
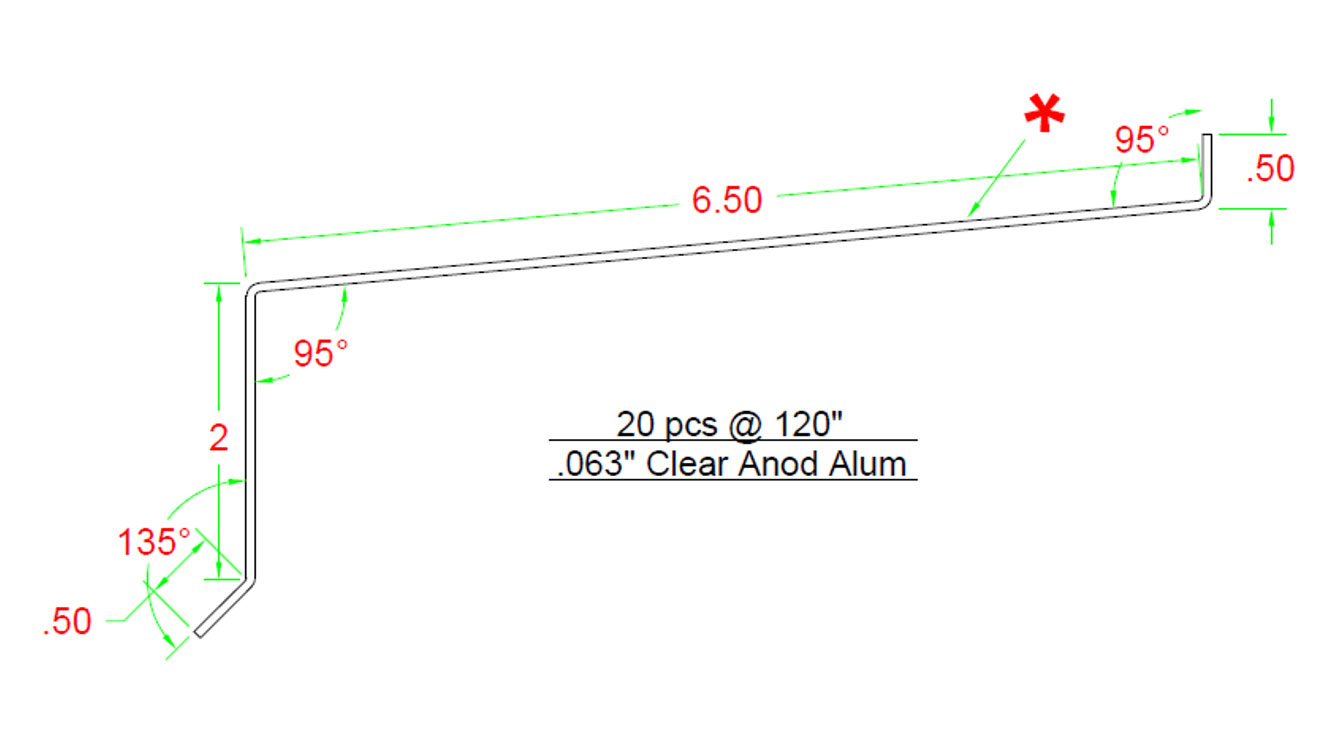
At its core, a brake metal shop drawing is the fabricator’s interpretation of what you ordered, translated into fabrication-ready information. It shows the dimensions of every leg, the angle of every bend, the gauge of the material, the finish, and the orientation.
Think of it like a recipe written back to you by the chef before they cook the meal. It’s their way of saying: “Here’s what we understood you to want. Does this match what you actually need?” The shop drawing review is your opportunity to confirm that the recipe is right before anything goes into the oven.
When a shop drawing comes back from the fabricator, it’s not a formality. It’s a question waiting for your answer.
The Key Elements to Check
Dimensions: Every single one. Confirm that each dimension matches what your field condition requires. A transposed digit or a misread dimension from the original order needs to be caught here, not when the bundle arrives on site.
For pieces that will be installed against existing conditions, make sure the dimensions on the drawing reflect the actual field measurements, not the design drawings. If your field condition differs from what the architect drew, the shop drawing should reflect the field, not the paper.
Bend angles. Most brake metal profiles involve 90-degree bends, but not all of them. When a profile such as a sloped sill flashing or a profile fitting a non-plumb surface, the bend angle matters and needs to be verified on the drawing. A bend that’s drawn at 85 degrees when the condition requires 80 degrees is going to create a gap that is visible and potentially a water management problem.
Gauge. Confirm that the gauge of metal or metal thickness shown on the drawing matches the gauge you specified and the gauge that is needed for your application. If the project specifications call out a minimum gauge, verify that the drawing meets it. If gauge was not explicitly specified on the original order and the drawing defaults to something lighter than you might expect, it is worth a conversation before fabrication starts.
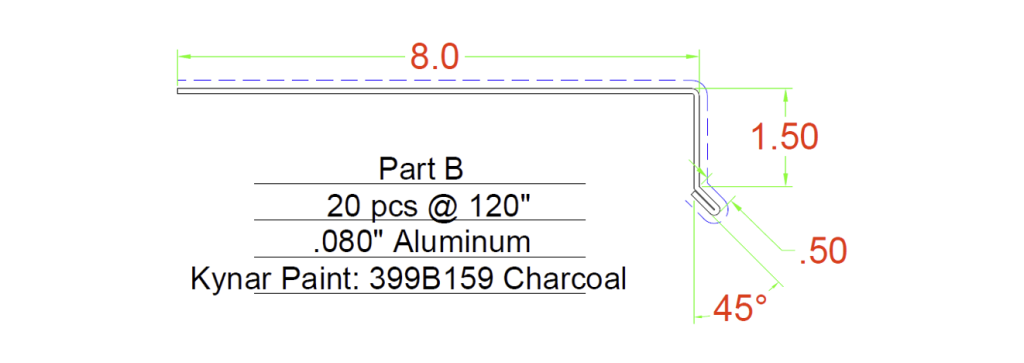
Finish and orientation. Confirm that the finish shown on the drawing is correct, that the finished face is on the correct side, and that any coating or treatment matches the project spec. A shop drawing that shows “painted finish – color TBD” when the spec calls for a specific Kynar color is a drawing that needs to be resolved before fabrication.
Quantities. Verify that the quantity shown on the drawing matches the quantity that the project requires. For large orders with multiple line items, it’s easy for a quantity to get transposed or a line item to get dropped. Also, keep it mind that any extra pieces will never be more economical to build than now, and consider whether or not you should order an extra stock length or two just in case there are any field cutting errors during installation.
Overall length and piece count for long runs. For profiles that run in long sections, such as coping and other continuous runs, make sure that the seams are in logical locations. You should also consider whether you will overlap the parts at the seams or whether you need short splices to go underneath the seams, and make sure those are included in your order if needed.
What to Do When Something Doesn’t Look Right
If a dimension is wrong, a profile isn’t what you ordered, or something on the drawing doesn’t match the field condition, mark it up and send it back. That is what the review process is for, and a good fabricator will not take it personally. The fabricator would much rather get a revision comment than fabricate the wrong piece.
Be specific in your markup. Rather than “this doesn’t look right,” note exactly which dimension is incorrect, what it should be, and why it looks off to you. The more information the fabricator has about what needs to change and why, the faster and more accurately they can revise the drawing and get back to you.
If the drawing is correct but something looks unusual, ask before you approve the drawing. Asking the question is not an admission of error on anyone’s part. It’s due diligence, and a fabricator who is confident in their work will be happy to explain the detail.
The One Thing Not to Do
Do NOT approve a shop drawing you have not actually reviewed. Signing off without checking is the equivalent of skipping the recipe review and then being surprised when the dish comes out wrong. If you do not have the time or information to properly review a drawing when it arrives, tell the fabricator you will need to get back with them. The fabricator would much rather wait an extra day for a real review than have a problem surface in the field.
The shop drawing review is one of the few points in the construction process where catching a problem is fast, free, and clean. Be sure to treat it that way.
Astro Sheet Metal is always happy to provide shop drawings with all custom brake metal orders and welcomes the kind of detailed review described above. If you are a glazing contractor or waterproofing sub in the Dallas-Fort Worth or Austin area looking for a fabrication partner who makes the process straightforward, reach out to us at 972-438-1110 or at astrosheetmetal.com/contact.